You may also download the
Notify+ User Guide (PDF)
Visit the online
Notify+ portal.
Notify+ service is fully functional in Google Chrome, Microsoft Edge, Safari, and Mozilla Firefox browsers.

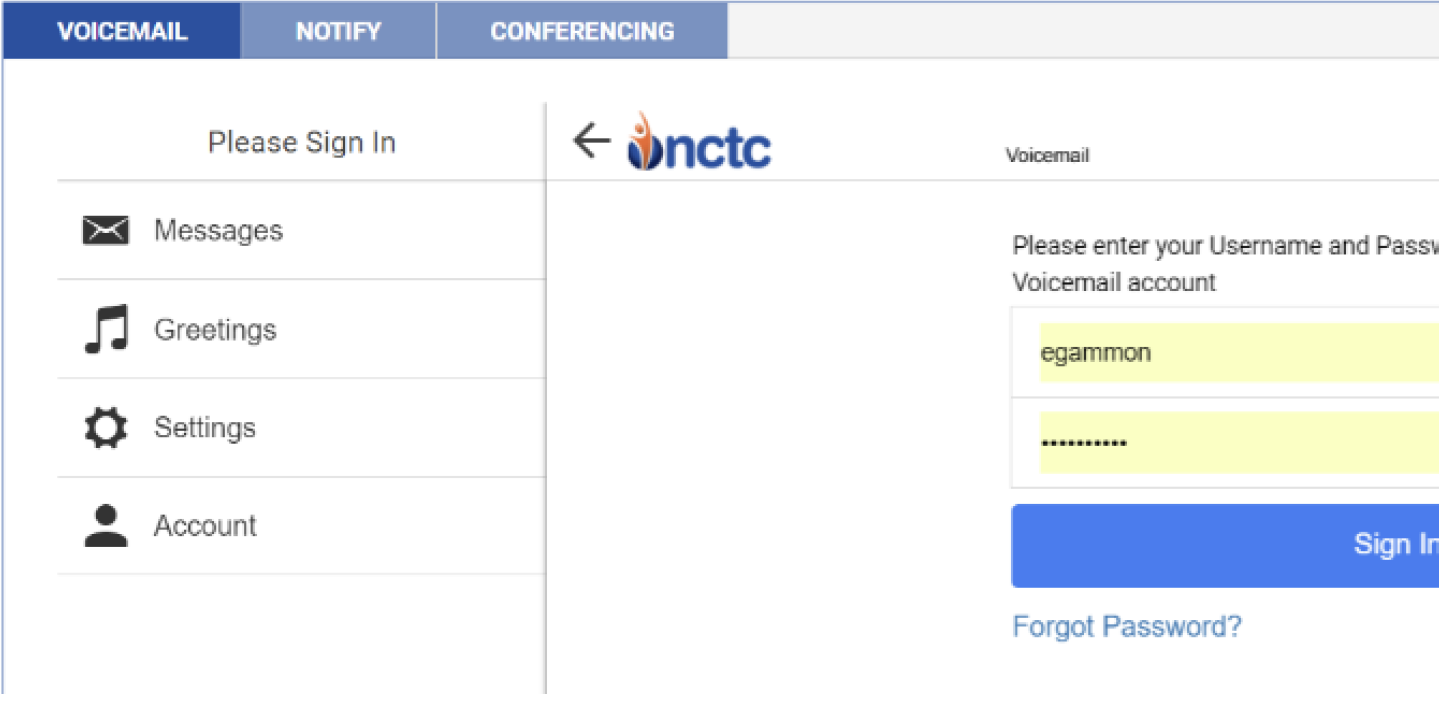
Enter your unique Username and Password to sign in to your account. If you did not receive your sign-in information, please contact our office at
(615) 666-2151.
PIN Number
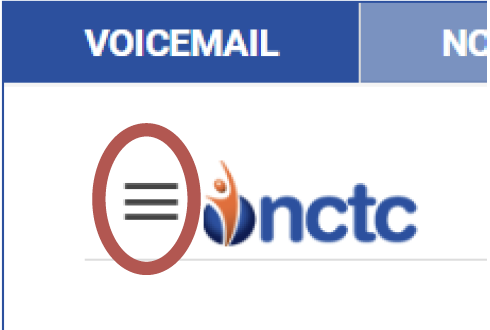
When you sign in, you will be prompted for a PIN Number. The first time you sign in you should use the default PIN of 0000. Click on the Menu icon circled in red and click on Account. Select Change PIN if you would like to change your PIN.
Main Menu

Click on the Menu Icon circled in Red and select 1 of 4 options that you wish to manage.
There are 4 administrative features to this service:
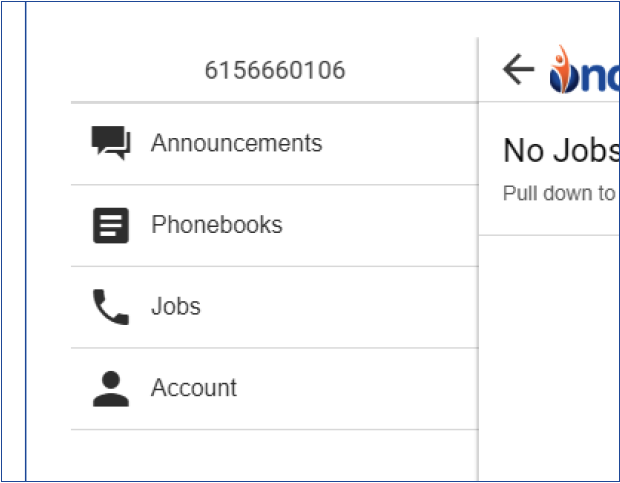 Announcements
 – Manage audio files that are available to be played for notification calls.
Phonebooks – Organize and store your phone numbers, email addresses and text addresses.
The Jobs – Add, delete, manage and activate your
notify jobs.
Account – Change your password or log out of the service
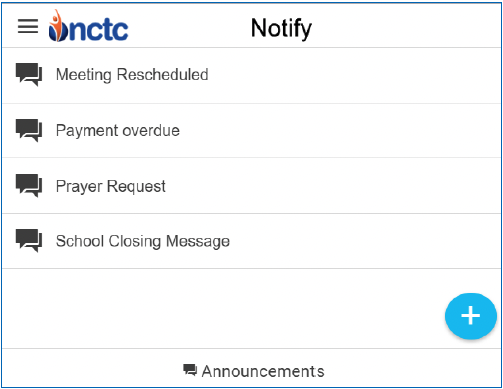
Announcements
These are recorded messages that you can send to your Phonebook contacts. From the Main Menu, press Announcements to access your current Announcement library.
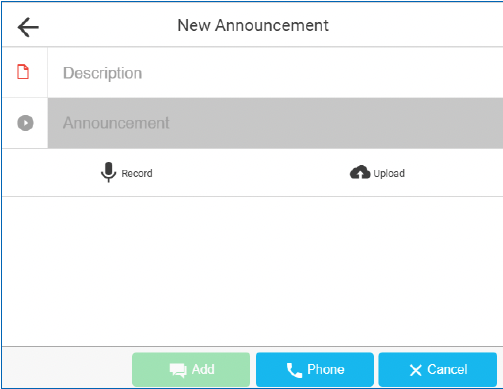
To record a new announcement, press the Blue + button to open the Actions window and select Add Announcement.
Enter a description for your New Announcement in the Description field.
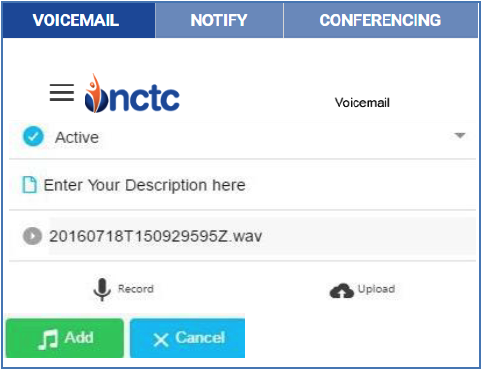
You can use your device or computer to Record by pressing the Mic button if displayed. Press Stop when you have finished recording your message. Press the text bubble button to save your recording.
The Cloud button, if displayed, allows you to upload a pre-recorded announcement from your Computer.
You can also call the Notify+ Admin Center to record your announcement at
(615) 688-2325.
Admin Center Phone-In Announcement Recording Instructions
After dialing in you will be asked for your subscriber ID, which is your 10 digit phone number including area code.
Once you have logged in, if there are no recorded announcements in your library you will hear: “You currently have no active announcement“ prior to hearing: ‘Announcement Menu”
- Press 1 to play your Announcement
- Press 2 to re-record your Announcement
- Press 3 to delete this Announcement
- Press 5 to pick a new Announcement
- Press 8 to change your Password
- Press 0 to hear these instructions again
You have the option of recording up to 20 notification announcements using the Pick a New Announcement option (Option 5), and using your phone pad, select a number for your announcement from “0 to 19”. If the number you select has no previously recorded announcement the prompt will say, “You currently have no active announcement.
After you have recorded your Announcement press the # key. Once your announcement has been recorded, the announcement will have a date and timestamp which you can rename from the Edit Announcement window.
Editing Announcements

You can edit your announcements by selecting an announcement from your announcement list which will open the Edit Announcement window.
To listen to the selected announcement press the Play button. To change the Announcement description type in the new description. The Download button allows you to save a copy of your recorded Announcement. To Delete this Announcement press the Red Delete button. Press the Update button to update the Announcement.
Phonebooks

Phonebooks are used to organize and store your Phone numbers and Email addresses. From the Main Menu, press Phonebooks to access your current Phonebooks.
To create a new Phonebook, press the Blue+ button and select the Add Phonebook option. In the Description field, create a name for your new Phonebook.
Press the Green Add button and choose from the drop-down options to add your Phone or E-Mail Contact. Phone contacts must include their Area Codes.
Upload multiple contacts at one time with the Cloud button. See further down for instructions on uploading multiple contacts from a spreadsheet.
Press the Green Check button to finish adding your contact to the Phonebook. It is important to press the Add button to save your Phonebook when complete.
Editing Phonebook Contacts
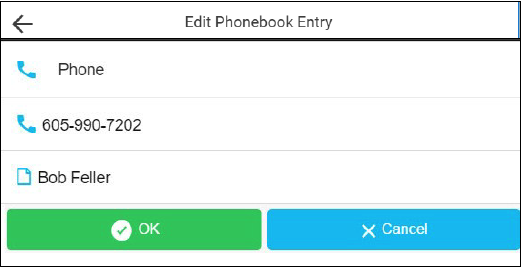
Open a Phonebook and click on a contact to open the Edit Phonebook Entry window.
Clicking on any of the three fields will allow you to change the type of notification (Phone, Email or Text message), the contact phone number, or the name of the contact.
Click OK once the edits have been made.
Click Update to close the entry and save the new changes in the Phonebook.
How to Import Batched of Phone Numbers, Email & Text Addresses
Spreadsheet File Creation Procedure
Data in this format needs to be created using three columns: Column A, containing the 10 digit phone number, Email address or text phone number and carrier’s domain name. Column B, can have a description or can be left blank, and Column C, which needs to have the number “0” if it is a phone number and the number “1” if it is an Email address and “2” if it is a text phone number. Use the CSV File type when you Save your Notification contact data.
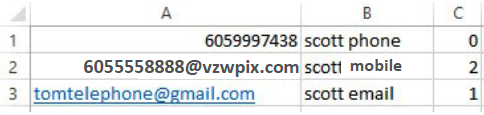
For
Verizon text messages use domain name @vzwpix.com,
AT&T text messages use @text.att.net,
US Cellular use @uscc.textmsg.com,
Sprint use @messaging.sprintpcs.com,
Bluegrass Cellular use @sms.bluecell.com. Contact us for other carriers.
Important Note: You must save and close the newly created file before Uploading into a Phonebook.
Contact us at
(615) 666-2151 for additional assistance with .csv files and converting data inside the columns into the right format.
Jobs
The Jobs section is used to add, delete, and manage notification jobs.
From the Main Menu press the Jobs button, this will display completed and scheduled Jobs. You can select any of the Jobs in your list to review details or to delete the Job.
To schedule a new Job press the Blue + button to open the Actions window and select Add Job.
Quick Job Feature (Red Fields)
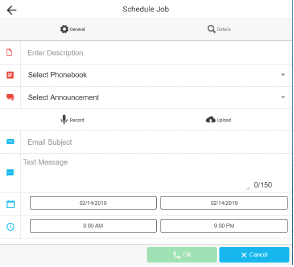
Create a Name for your new Job in the Enter Description field, Select a Phonebook, Select an Announcement, press the Phone button, and your Job will start immediately!
Use Upload to add a new announcement for this Job. Once an Announcement has been selected, a Play button will allow you to listen to the Announcement.
You can enter an Email Subject or text line if you are sending Email or text notifications.
For Email Notifications, enter the message that you would like recipients to receive. Use the Calendar field to set specific Job Start and End dates. You can also use the Time field to select the time range when you would like the Job to run. Press Set to complete your selections.
Press the Phone button to schedule or send out the Notification Job to your selected Phonebook.
The Calendar and Time fields allow for scheduling of future Jobs. By default, Notify+ will only send out Jobs between 8 a.m. and 9 p.m.. Please contact our office if there is a need to change those default times. When you signed up for this service we created certain defaults to meet your needs, refer to page 6 for more information on the Additional Job Features of this service.
Cloud Upload
If displayed, Notify+ allows you to upload files from your computer into the service. These files could be Announcement recordings of Phonebook contact entries,
Download
All addresses in a phonebook can be exported to an Excel spreadsheet file by opening a phonebook and pressing the Download button if displayed.
Use Download to Create a Template Spreadsheet for your Contacts
To set up a template guide for creating large spreadsheet lists for import into your phonebook, use this function after you have added to your phonebook a single phone number, text, or email address.
Federal Robocall Restrictions May Apply!
Important Note!
You may be subject to FCC requirements to use the Opt-Out option of this service and to record the name of your company in the Preamble Announcement (Introduction Message) if your jobs are purely for sales/telemarketing calls. Failure to do so may violate FCC regulations.
The FCC requires additional reporting for these types of calls. There are exemptions to this order that include political, non-profit and informational reminder notifications.
Refer to the
FCC website and search Telemarketing and Robocalls for further guidance.
Additional Job Features
The Details section provides additional features for your Notify+ Jobs that affect call notification attempts, as well as special response options for your notification contacts. When you set this service up with us, we created certain de faults to meet your needs so that you would not normally need to adjust settings in the Details section. The glossary below explains the functions.
Retries: Enter the number of times the job will re-dial each phone number that has not successfully answered a call. Note: Select “0” and the number will be called just once.
Delay (minimum): You can select in minutes the amount of time you want the service to wait before it attempts to redial Phonebook contacts who haven’t successfully received the recorded announcement.
Double Delay: You can double the Redial Delay time between every attempt related to the Redial Delay.
Minimum Time (seconds): Enter the minimum number of seconds the announcement must be played when a call is placed for the call to be considered successful. This number should closely match the length of your Announcement if you want them to hear the entire notification message.
Email: Set to Send When Complete to have Notify+ send an Email report when this job is complete. To add or delete completion report Email addresses, press the Blue + button and select Setup Job Report Email.
Response: Setting this option to Enabled will allow the called person to press a digit on the phone in response to the notification announcement (e.g. “Press 1 if you agree, press 2 if you disagree.”) The pressed digit will be displayed in the job report Email. Response must also be Enabled to use the Transfer feature.
Transfer 1, 2, 3: Set to Enabled to transfer the call to a phone number or another subscribed service such as Voice Mail when a digit on the phone is pressed. This setting will be disabled if Response is set to Disabled. You can have up to 3 different Transfer options.
Digit: Choose the digit (0 to 9) on the phone that can be pressed to transfer the call. This setting will be disabled if Transfer is set to Disabled.
Transfer Type: Choose the type of transfer that will occur. Options include Address or Service. This setting will be disabled if Transfer is set to Disabled.
To: The target of the call transfer. If the Type is an Address, then a 10 digit phone number must be entered in the field. If the Transfer Type is Service, then a subscribed service like Voice Mail must be selected. This setting will be disabled if Transfer Enabled is set to No and is required if Transfer is set to Disabled.
Opt Out: Select Enabled to give called numbers the option of opting out of future Notify+ Jobs. Select Disabled to turn off the Opt Out option.
Digit: Choose the digit on the phone that can be pressed to opt out of future Notify+ jobs.